
Drop in a stream or recording and InkBurst detects the Clutch, Epic, Chaos and Finish moments on its own — then cuts Shorts, Highlight Reels and beat-synced Montages ready to publish.
Four steps. No manual scrubbing through a two-hour recording looking for the one good moment.
Point InkBurst at a local recording — any length, any source.
Audio-energy analysis finds the peaks and tags each one by tone.
Fine-tune the exact start point, add transitions and music, or build a full Montage.
Render vertical or landscape, then push straight to YouTube Shorts or TikTok.
Real panels from the app — not mockups.
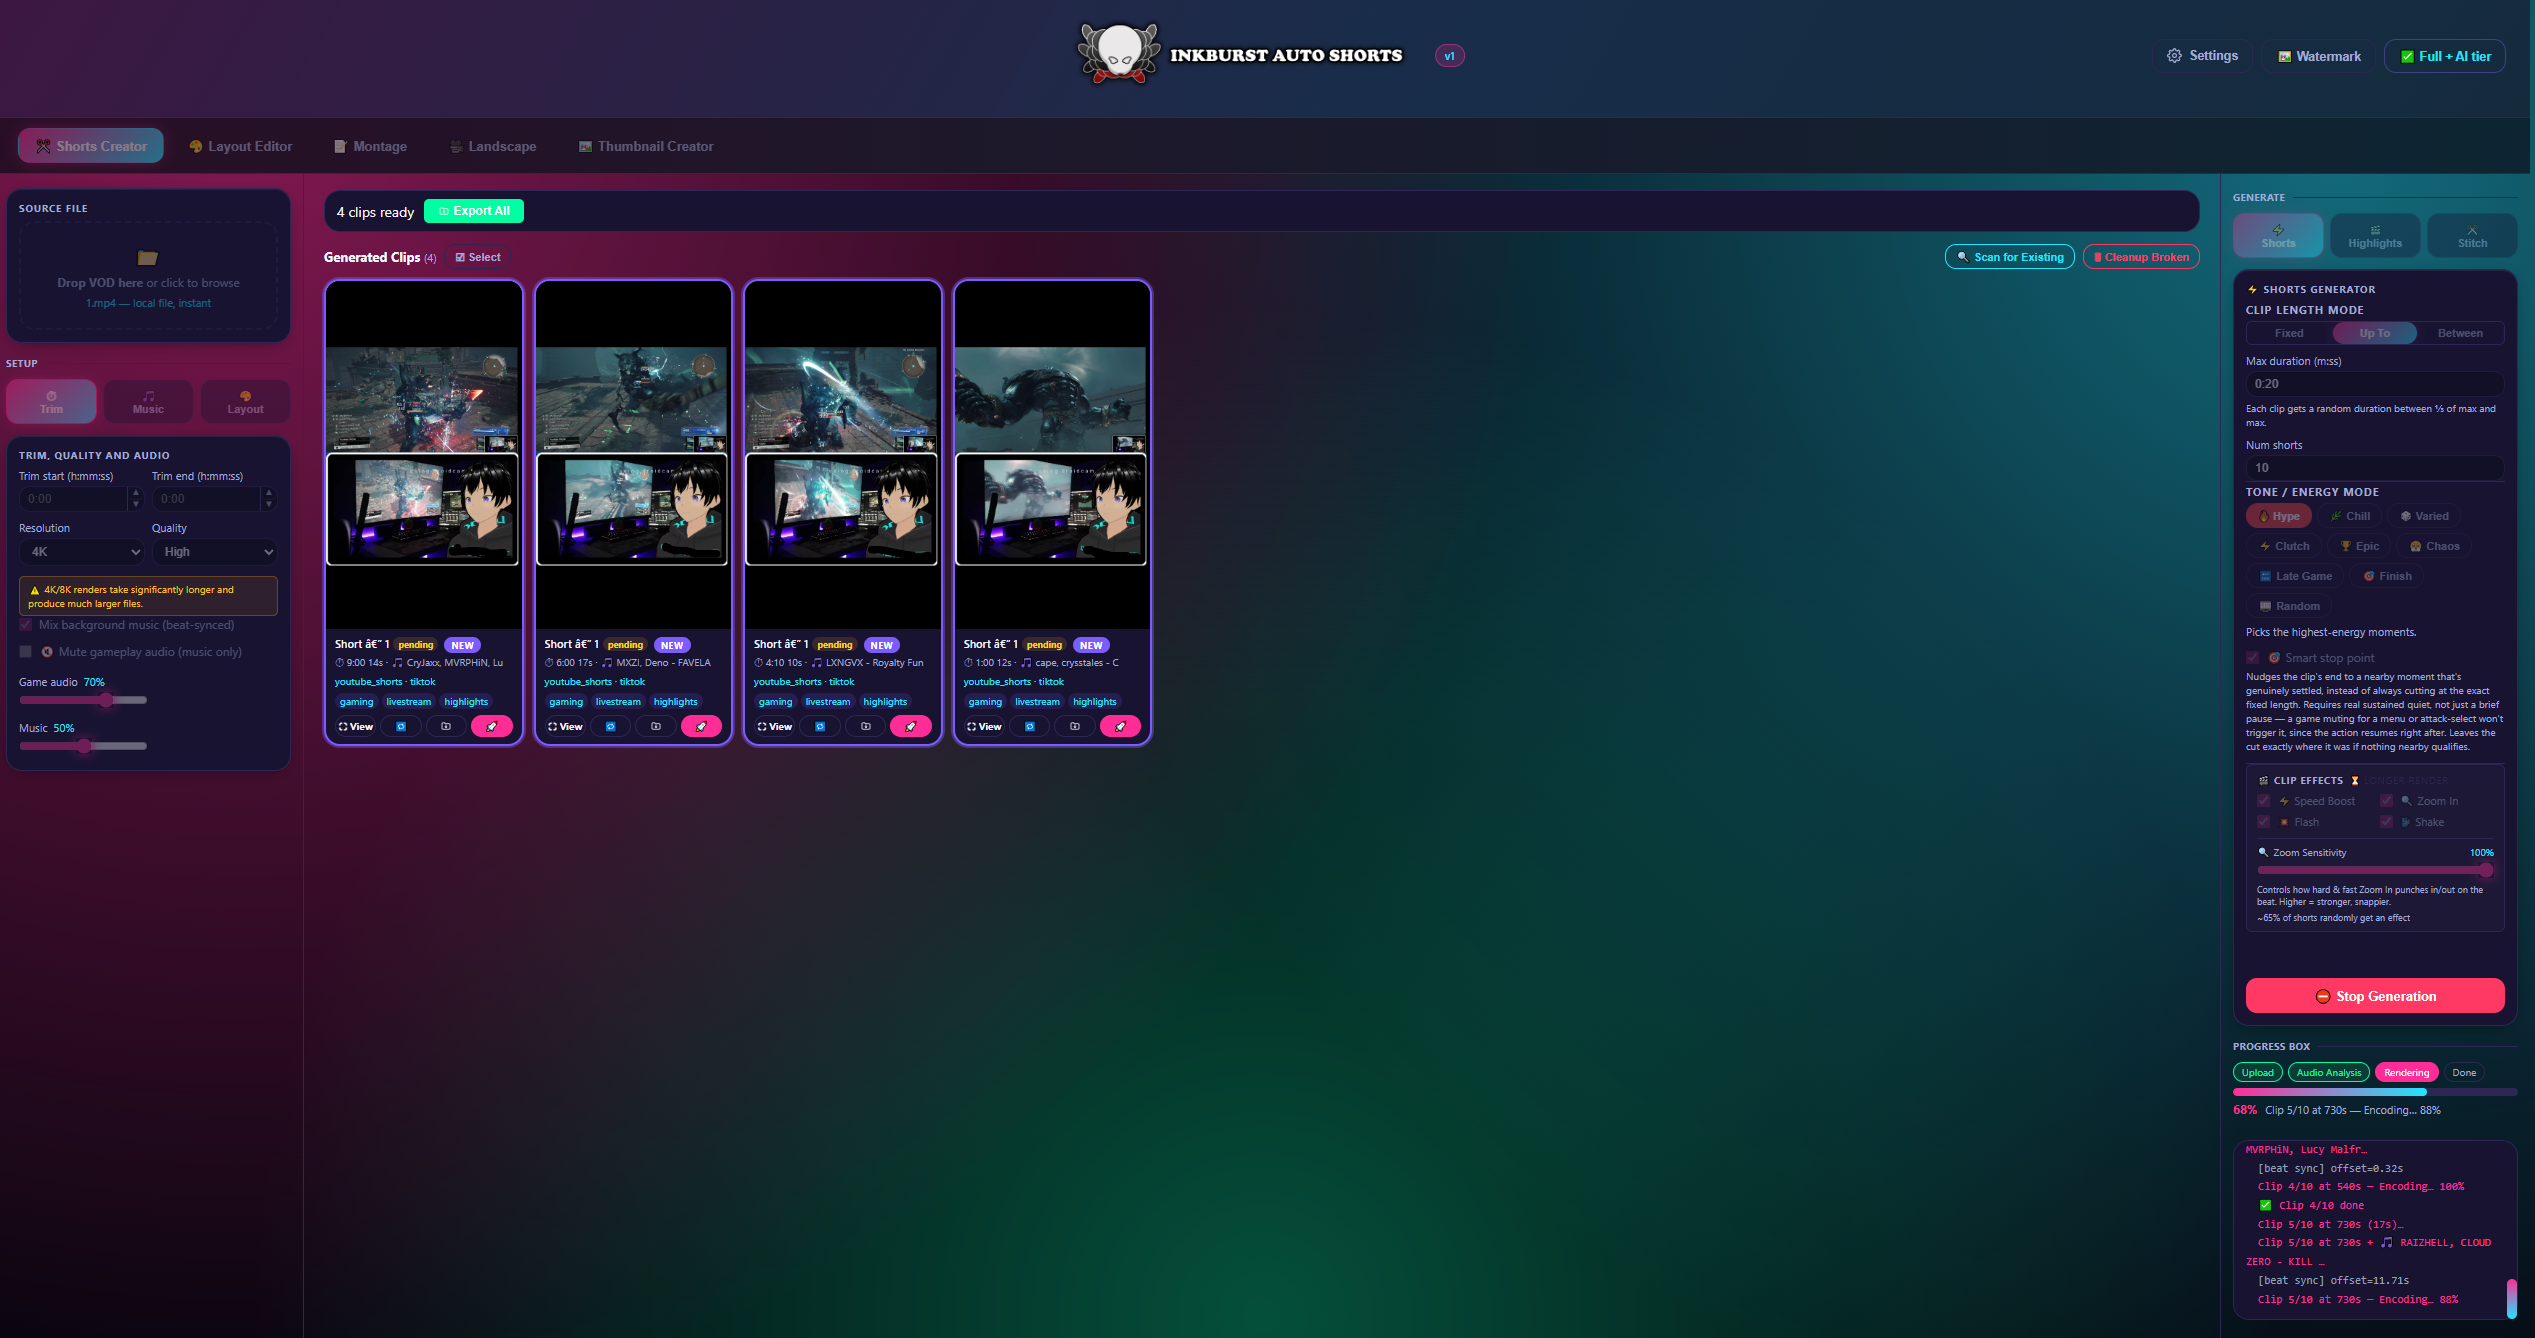
Tone-aware detection picks the moments, renders them in the background, and lands finished Shorts here — titled, scored, and ready to export.
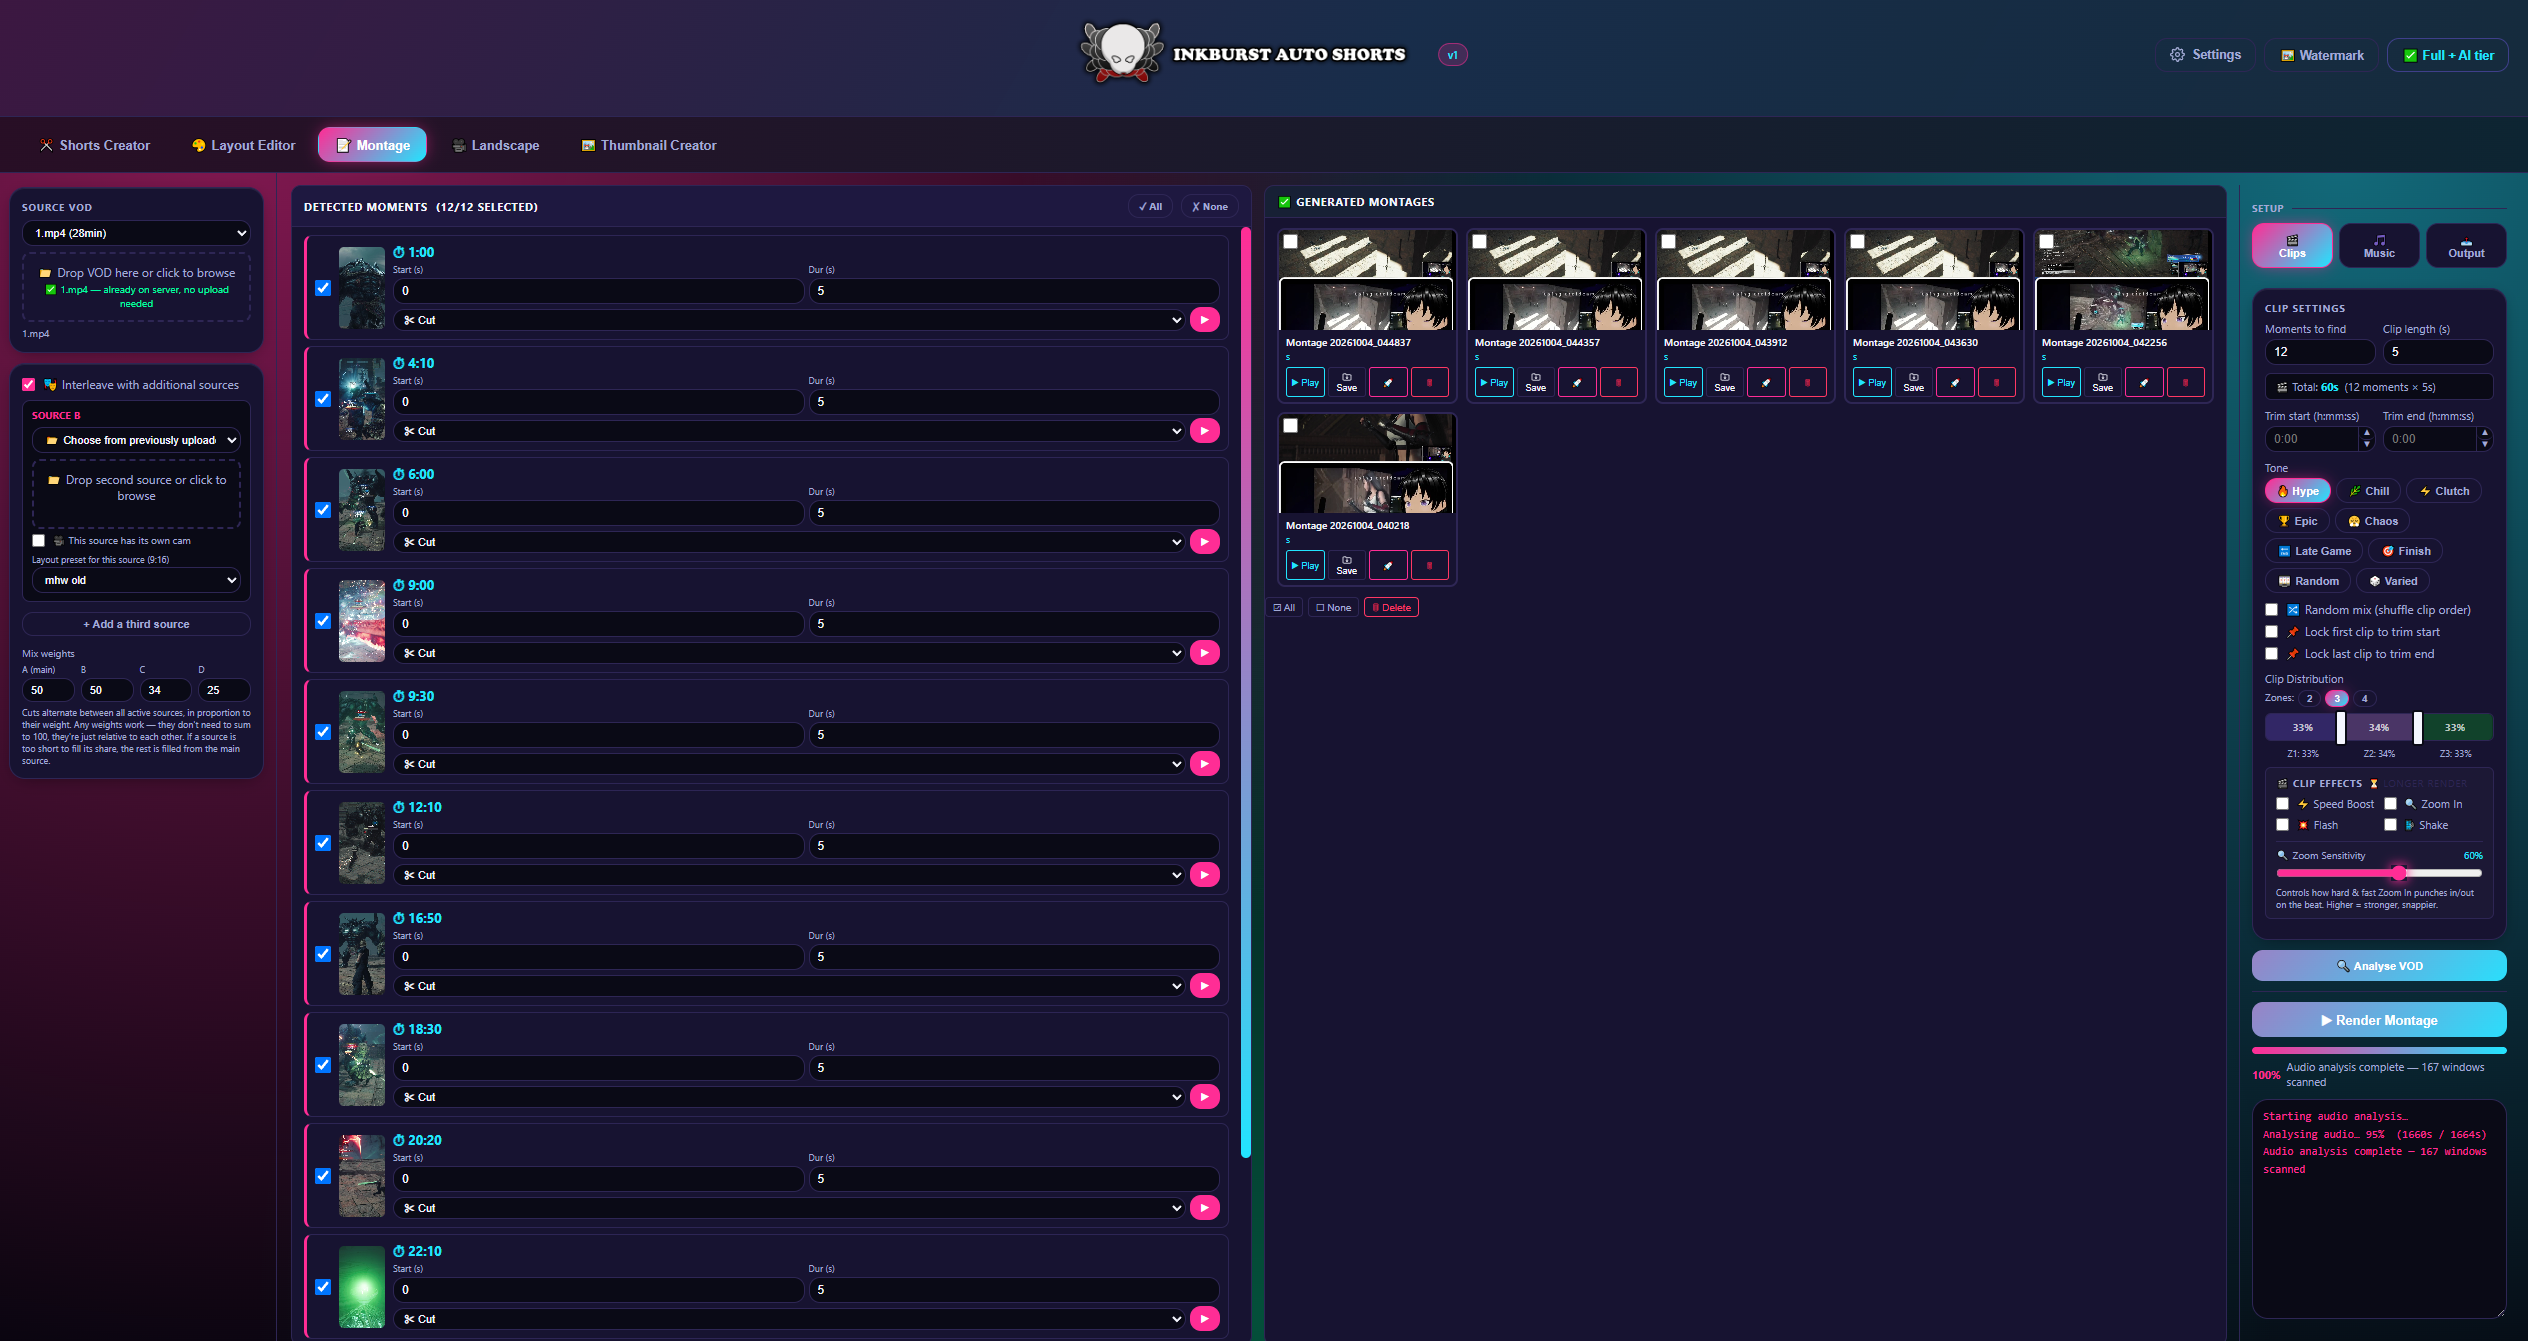
Detected Moments on the left, your rendered Montages on the right — interleaved sources, transitions, and beat-synced music all live in the same Setup panel.
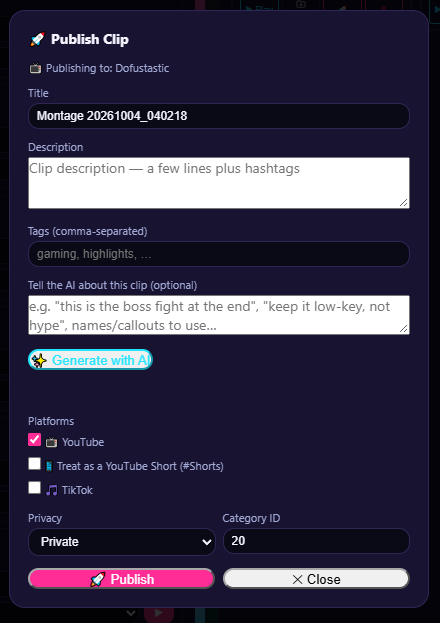
Generate with AI fills the title, description and tags from a one-line prompt — then pick your platforms and publish straight from the app.
Every feature below ships in the app today — grouped here by what it does, not by tier.
Full-length VODs cut into vertical Shorts automatically, with tone-aware moment detection — unlimited outputs.
The best moments from a session auto-stitched into one reel, or assembled manually clip by clip.
£17.99+Full control over montages in landscape or portrait — 20+ transitions, beat-synced music, PNG overlays for custom logos, and Set Start Point to lock in the exact frame a clip begins.
£29.99+Speed ramps, zooms, shake, colour grade and more, applied straight onto any Short or Reel.
£29.99+Turns your best moments into an automatic intro and outro for your long-form videos, with PNG overlays for your custom logo.
£29.99+Build custom thumbnails from any frame, with text layers and fallback-safe fonts baked into the app.
£29.99+Give it a quick description of your video and AI writes the title, description and tags — plus designs thumbnail layouts for you.
£34.99Upload your logo once and it's baked into every Shorts, Highlights, Montage, Stitch, and Landscape render automatically — swap the file any time to update it everywhere at once.
£29.99+Clutch, Hype, Epic, Varied, Chaos, Finish and Lategame pills — each tuned to pull a genuinely different moment, even from a 1-minute clip.
Push finished clips to YouTube Shorts or TikTok from inside the app, with your own API credentials.
Every tier below is cumulative — each one includes everything in the tier before it. One license per device.
All tiers include the companion PNG Tuber app once it ships.
InkBurst uses a "bring your own API credentials" model for publishing — the same pattern Google requires of any desktop app that uploads on a user's behalf. This keeps your uploads tied to your own Google account, with no shared key and no InkBurst-run server in the middle.
A couple of things are easy to miss the first time:
No. The only automatic network call it makes is to verify your Patreon tier/license key — no analytics, no tracking, nothing running in the background. Detection and rendering happen 100% locally with ffmpeg. The only other outbound calls are ones you trigger yourself — your own YouTube/TikTok upload, or AI Tag Gen's call to Anthropic using your own key. Nothing goes anywhere unless you click the button that sends it.
Yes — it's a false positive, and a common one. InkBurst is built with PyInstaller, which packages a full Python runtime into one executable; unpacking a bundled runtime at startup looks behaviorally similar to how malware droppers work, even though nothing hidden is going on. The app also isn't code-signed yet (an individual certificate now runs £300–500+/year) and is new enough to have no SmartScreen reputation built up. If Defender blocks the install, click "More info" → "Run anyway," or add an exclusion for the folder. Signing is on the roadmap once the Patron base can support the ongoing cost.
Expected for very long sources — a 2hr+ VOD takes longer to upload into the app, and anything 5+ minutes takes longer to render (depending on your machine). The app hasn't hung, it's just working through more footage. A ~30-minute VOD uploads noticeably faster.
Each Patreon pledge includes one license per device. If you need it on a second machine, that's a separate license.
The app keeps anything you've already rendered. Features above your remaining tier (or all features, if you cancel entirely) lock again until you resubscribe.
Moment detection scales its analysis window to the clip's length, so even a very short source still gets genuinely distinct Clutch/Epic/Chaos/Finish picks instead of the same timestamp repeated under different labels.
The full walkthrough, tab by tab, with real screenshots from the app.
Installing. InkBurst Auto Shorts is a Windows desktop app. Download and run the installer you get access to through Patreon — no separate setup needed beyond that.
Logging in. Click 🔑 Login with Patreon in the top-right corner. This opens your browser to Patreon — log in there if you haven't already, then approve the InkBurst Auto Shorts access request (your email, Patreon identity, and pledge info). A "Login complete!" page confirms you can close that tab; switch back to the app and the button updates automatically to show your active tier.
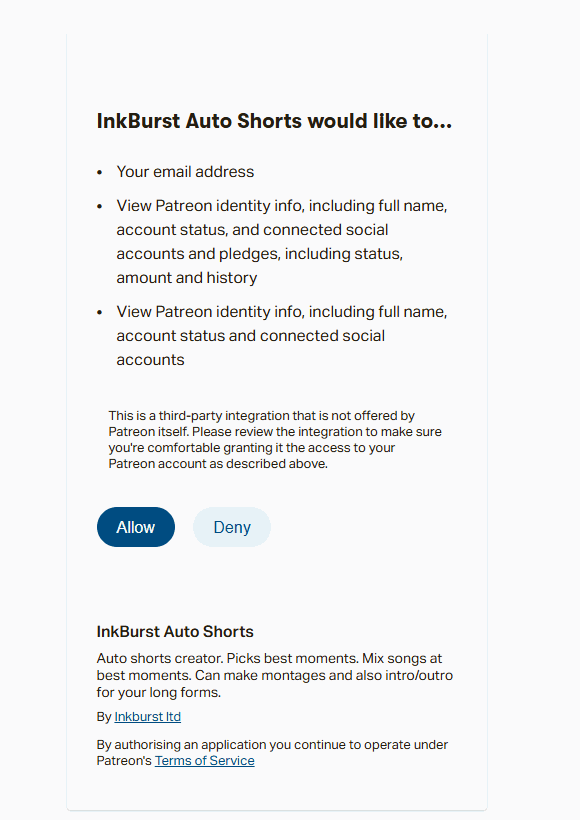
Patreon's access request — review it, then Allow.
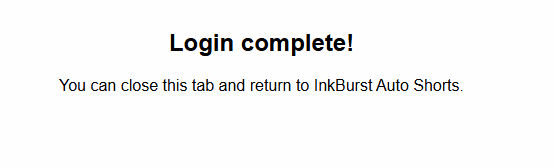
"Login complete!" — close the tab and switch back to the app.
If login doesn't finish within about two minutes, the button resets to Login with Patreon — just try again.
Tiers. Your Patreon pledge unlocks features cumulatively — each tier includes everything below it. A locked tab shows a lock icon and a short note on which tier unlocks it — click it to jump to Patreon.
The five tabs, top to bottom: ✂️ Shorts Creator (your main vertical-clip tool), 🎨 Layout Editor (fine-tune your 9:16 crop — any paid tier), 📝 Montage, 🎥 Landscape, 🖼️ Thumbnail Creator.
This is where you turn a VOD into a batch of vertical (9:16) Shorts. The sidebar has three stacked groups: Source File, Setup, and Generate.
Drop a VOD onto the dropzone, or click to browse. If you've used this VOD before (or it's already on the server), you'll see "already on server, no upload needed" or "local file, instant" instead of an upload step — a brand-new VOD still gets copied to your Uploads Folder first, with its own progress stage, before analysis starts.
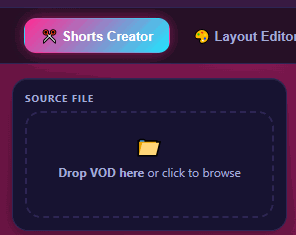
The Source File dropzone.
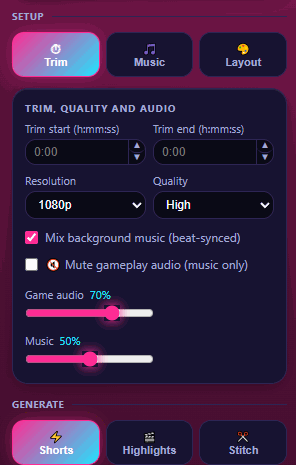
Trim, Resolution, Quality, and the audio mix.
Point at a Music folder (the app scans it and auto-matches a track to each clip's energy) or set one exact track to use every time.
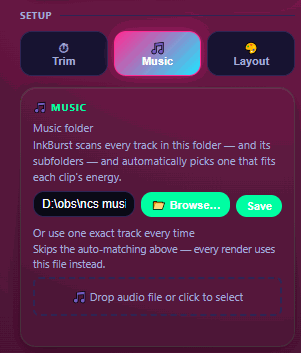
Pointing the Music folder.
Apply a saved Layout Preset (built in the Layout Editor tab) to control how game/cam footage is cropped into the 9:16 frame.
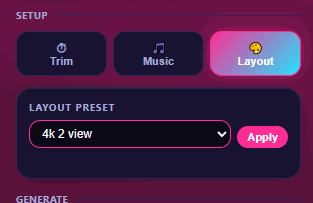
Applying a saved Layout Preset.
Hit ▶ Process VOD to start, or ⏹ Stop Generation to cancel mid-render. Finished clips land in the Generated Clips grid below.

Render progress and the live log.
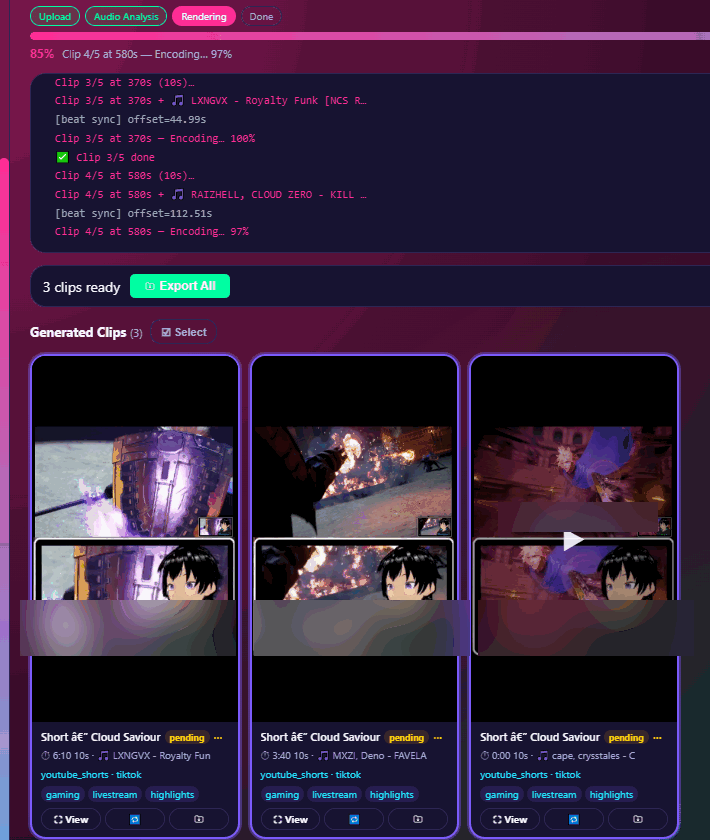
The Generated Clips grid.
Still inside Shorts Creator's Generate group, two more tabs sit beside Shorts.
Builds one longer 9:16 reel instead of several short clips, analysed independently of your Shorts settings.
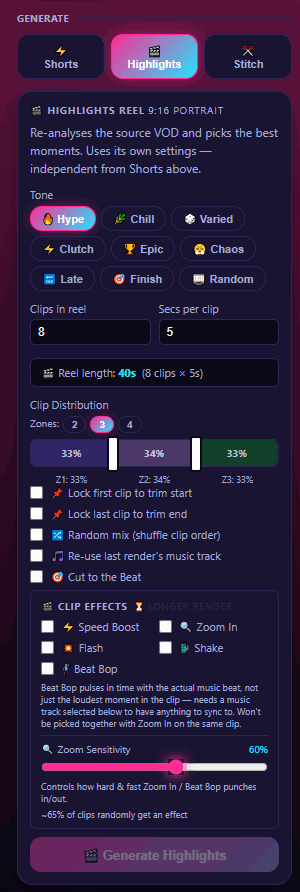
The Highlights Reel panel.
Hit 🎬 Generate Highlights.
Manually glue clips you've already rendered into one reel, in whatever order you pick.
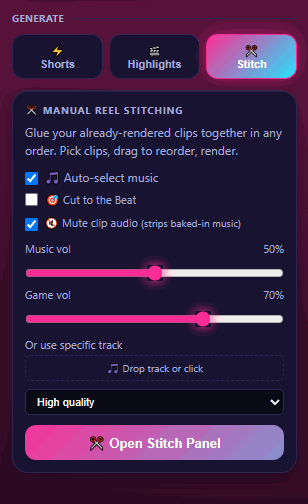
The Stitch panel.
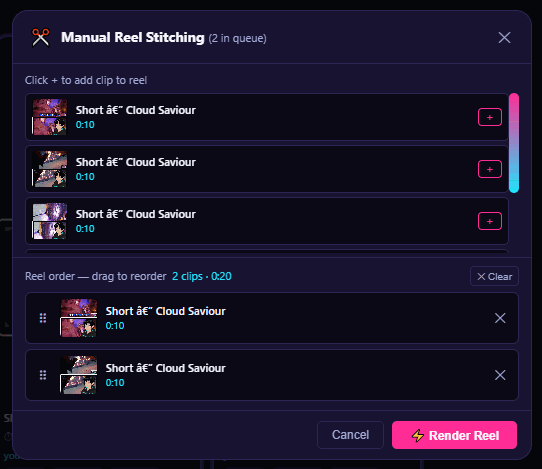
Clips queued up in stitching order.
Click a clip — in Generated Clips or the Stitch queue — to open Re-render Clip: adjust New duration, Quality, Start offset, Adjust end, volume sliders, and an auto-find-best-music checkbox. Hit ▶ Re-render to regenerate just that one clip.
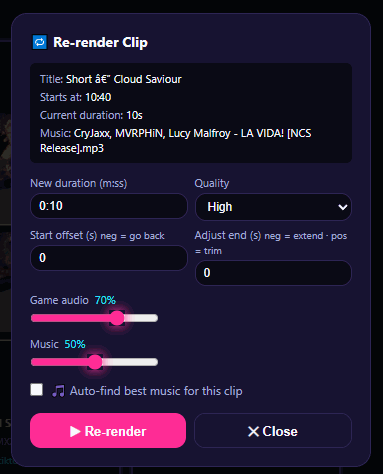
The Re-render Clip dialog.
Available to any paid tier. This is where you tell the app how to crop your game footage and webcam into a 9:16 frame — and save that as a reusable preset other tabs can apply.
Either Grab Frame from VOD — pick a video, type a timestamp, click Grab This Frame — or Load Screenshot to drag a file in directly.
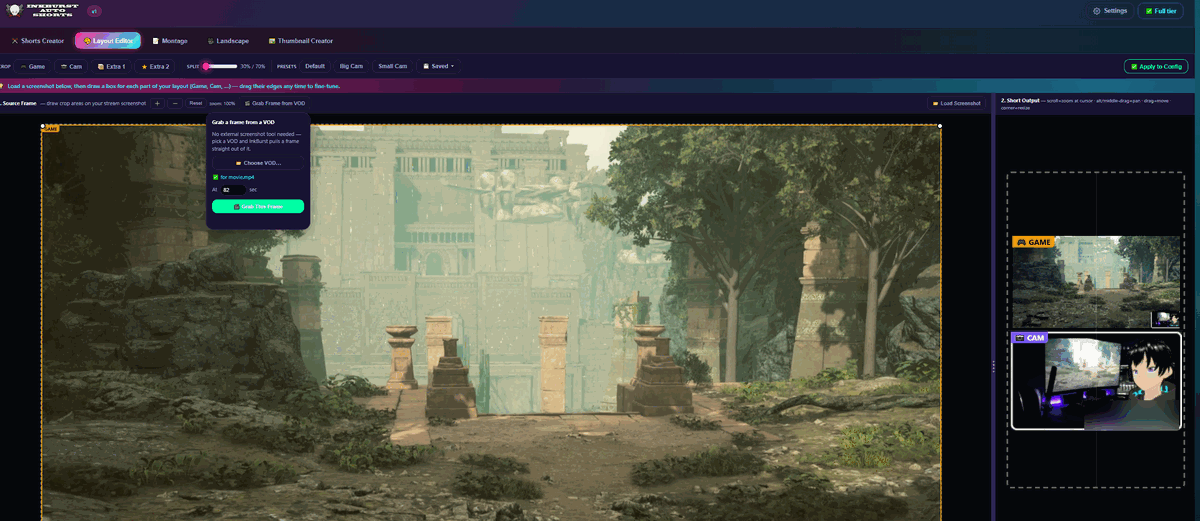
Grabbing a frame straight from the VOD.
Scroll to zoom, drag a box to move it, drag a corner to resize it. Lock aspect ratio, Lock layout, Magnetic snap, and Center guides keep things aligned while you drag.
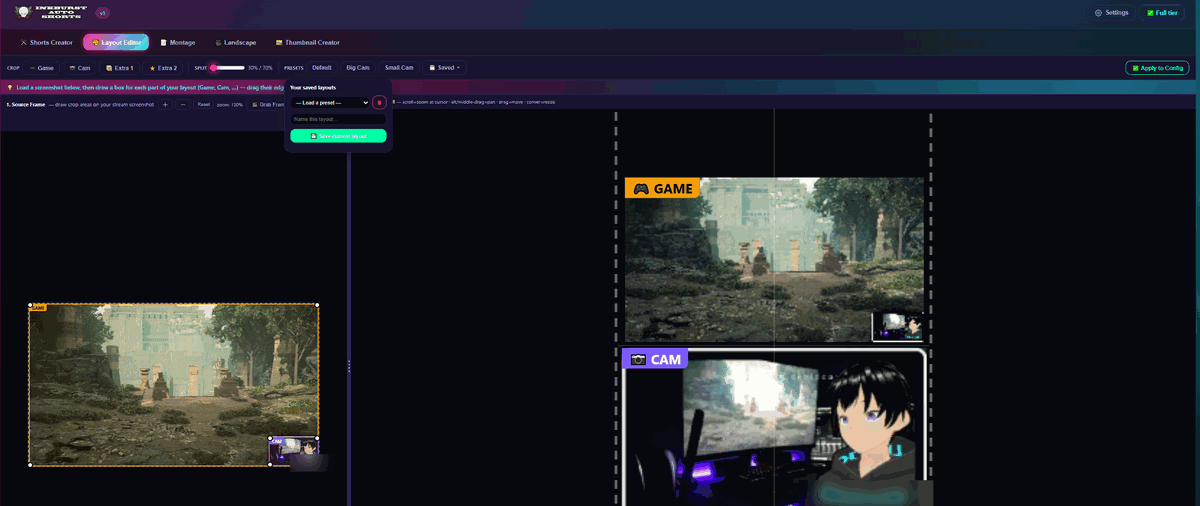
Saved layouts, and the Output (Short) preview with its layer list below.
Builds a multi-clip montage, in either 16:9 or 9:16, with transitions between clips.
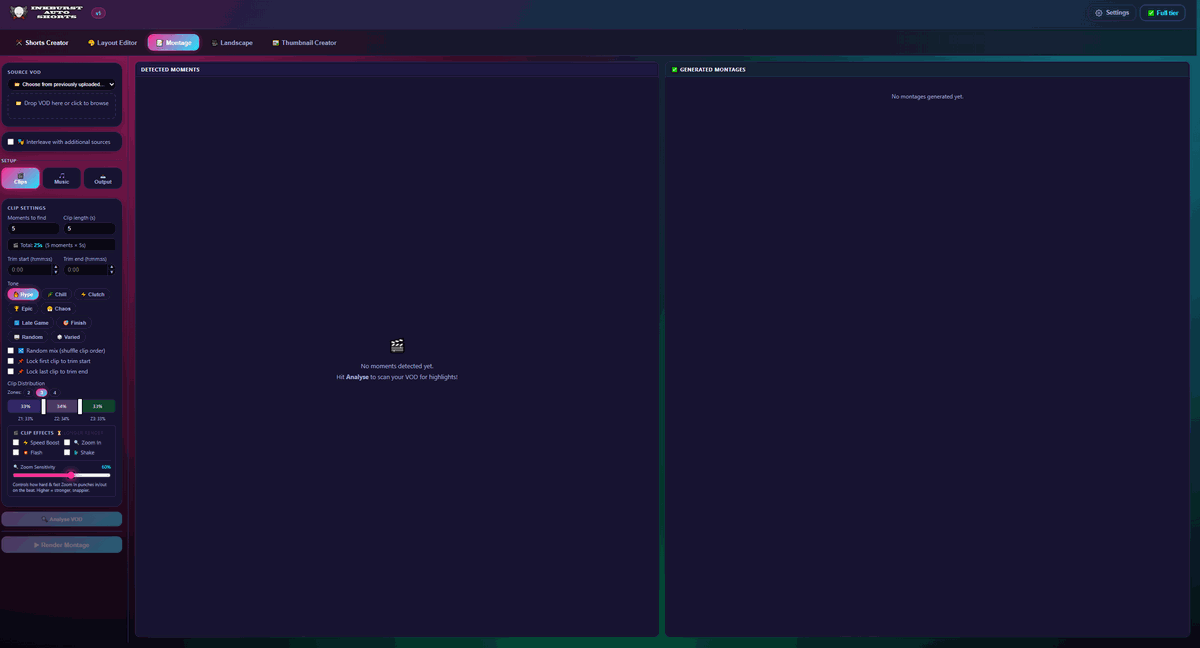
The Montage tab before analysing a VOD.
Choose your primary VOD, then turn on Interleave with additional sources to weave in clips from up to three more VODs. Each added source gets its own VOD picker, Layout Preset, and mix weight (a relative ratio — doesn't need to sum to 100).
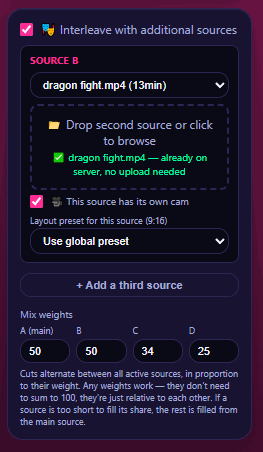
A second source (B) added via Interleave.
Set Moments to find, Clip length, and Trim start/end — a live Total readout updates as you adjust. Click 🔍 Analyse VOD first — this is required before you can render.
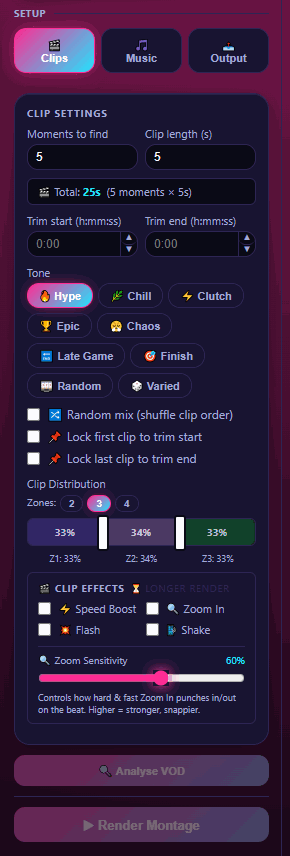
Clip Settings, including the Trim fields and live Total readout.
The Detected Moments list shows each clip's thumbnail and timestamp, with Start/Dur fields you can nudge, a per-clip Cut transition dropdown, and a preview button. Scrub the preview to the exact frame you want, then hit 📍 Set Start Point Here to lock a clip's start to that exact point instead of the auto-detected one.
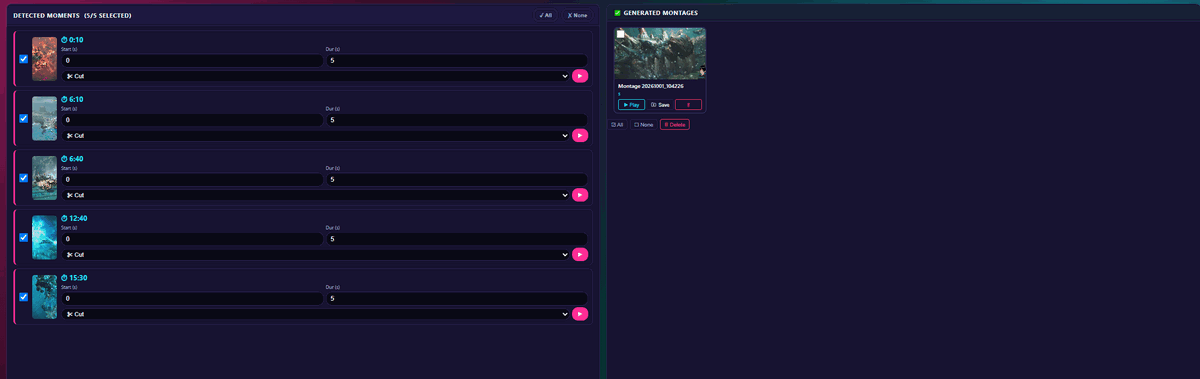
Detected Moments on the left, Generated Montages on the right.
Format: 16:9 or 9:16. Transitions: Cut, or a wide range of fades, wipes, slides, cover/reveal, camera and dissolve effects.
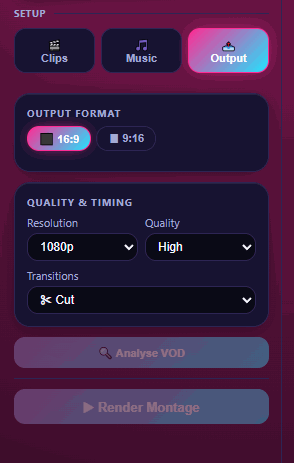
Montage's Output panel.
Same pattern as Shorts/Highlights — background music toggle, Cut to the Beat, auto-select or one specific track, mute gameplay audio.
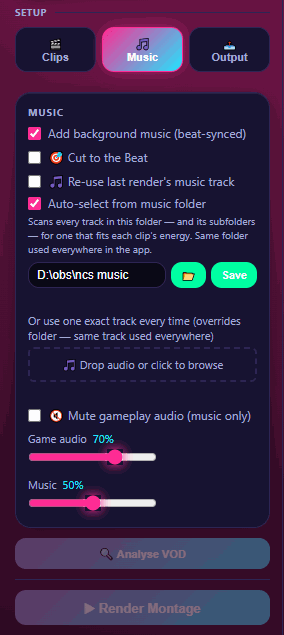
Montage's Music panel.
Hit ▶ Render Montage. Each result in the Generated Montages grid gets Play, Save, and Delete.
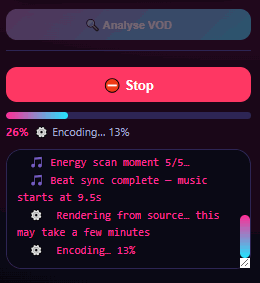
Montage rendering, with its own progress and log.
Two sub-tabs for 16:9 landscape content: 🎬 Highlight Reel/Intro and 🎞️ Outro Generator.
Pick tone pills, clip count, and duration — a live Reel length readout updates as you adjust. Add an optional Overlay (up to 4 images) that sits on top of the whole reel — a logo watermark or a "SUBSCRIBE" callout, freely positioned on the live preview canvas.
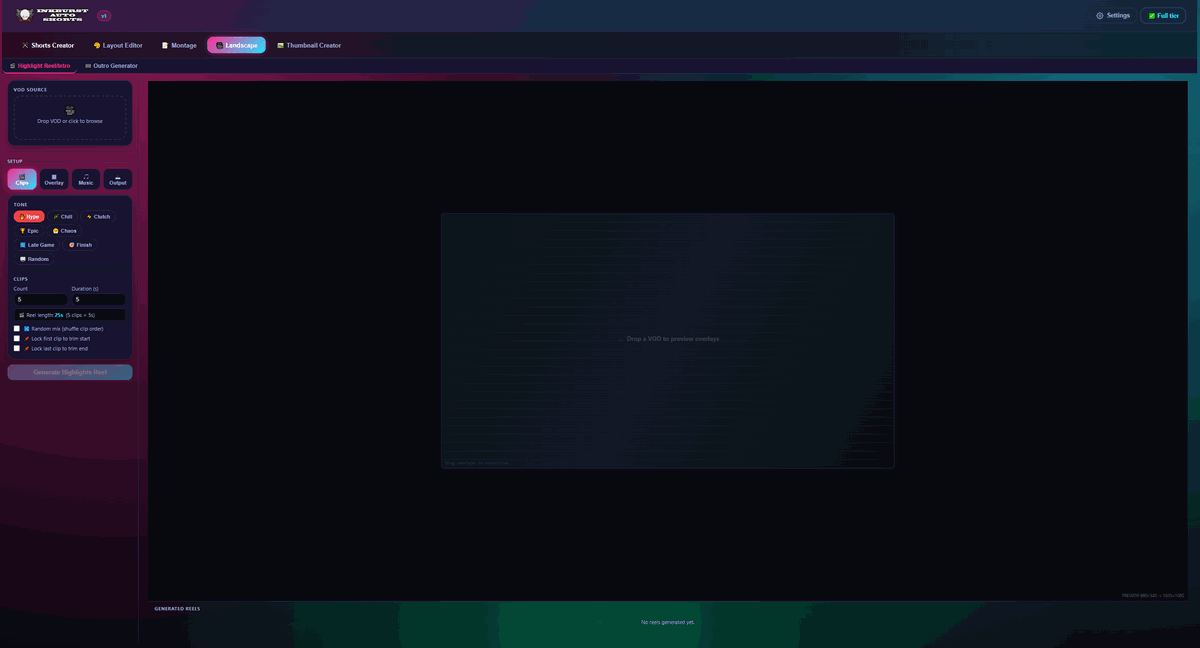
The Highlight Reel/Intro tab, empty state.
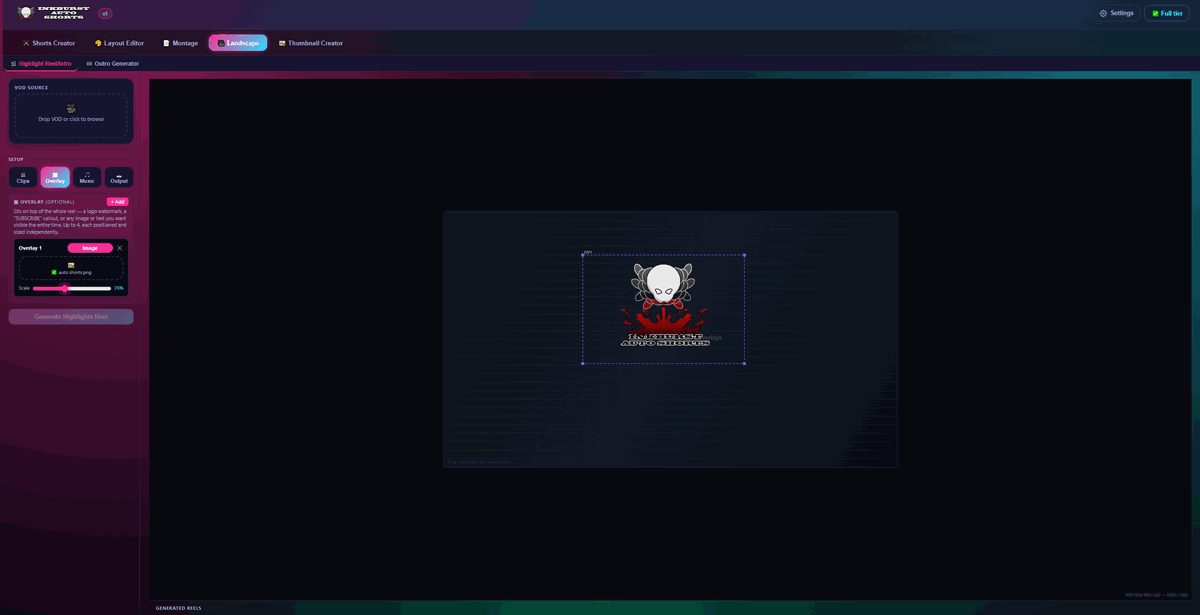
The Overlay panel, with a logo watermark placed on the preview.
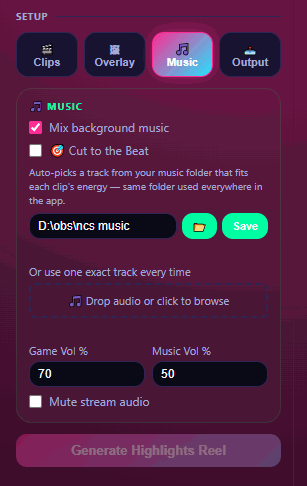
Highlight Reel/Intro's Music panel.
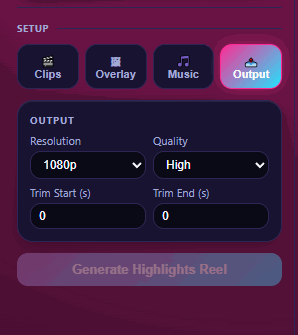
Highlight Reel/Intro's Output panel.
Hit 🎬 Generate Highlights Reel. While it runs, the progress panel has its own Analyse / Clips / Reel sub-tabs so you can check back on each stage.
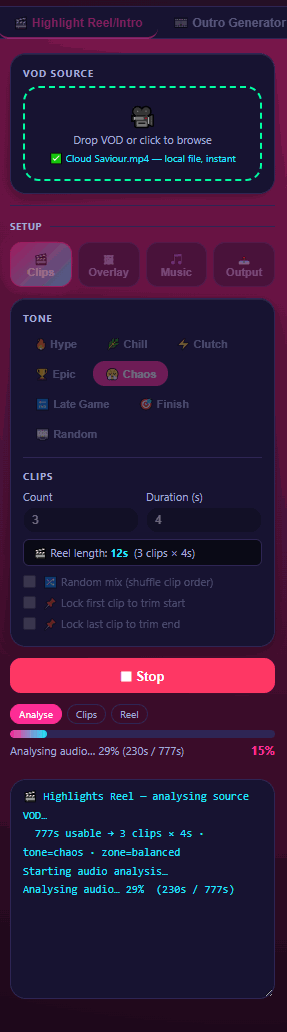
Generating a reel — note the Analyse / Clips / Reel progress sub-tabs.
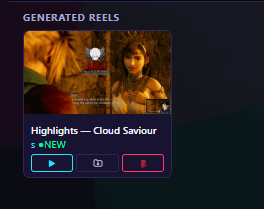
A finished reel in the Generated Reels grid.
Drop in a VOD — a good closing scene is auto-picked. Add an optional overlay (up to 4 PNG files), then choose Effects: Blur, Pixelate, Grayscale, Brightness, or Vignette, with Fade In/Out controls.
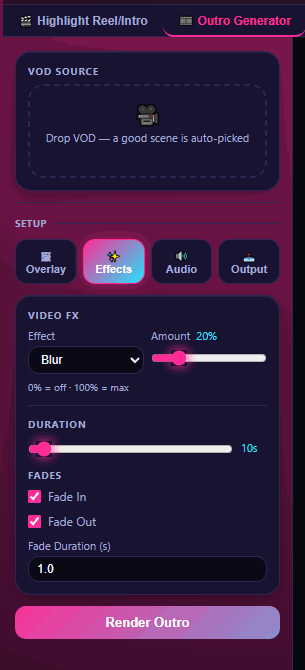
The Outro Generator's Effects panel, including Fade In/Out.
Generates still-image thumbnails from a VOD.
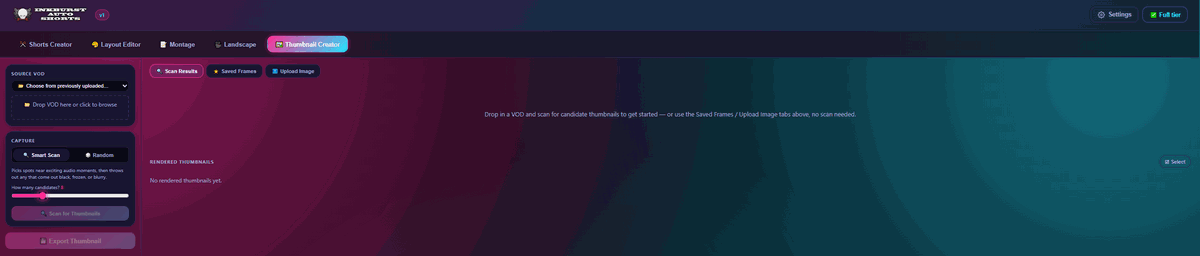
The Thumbnail Creator tab before scanning.
Pick a VOD, then choose 🔍 Smart Scan (picks spots near exciting audio moments, filters out black/frozen/blurry frames) or 🎲 Random. You can also skip scanning: ⬆️ Upload Image starts from your own photo, and ⭐ Saved Frames holds any frame you've starred for later reuse.
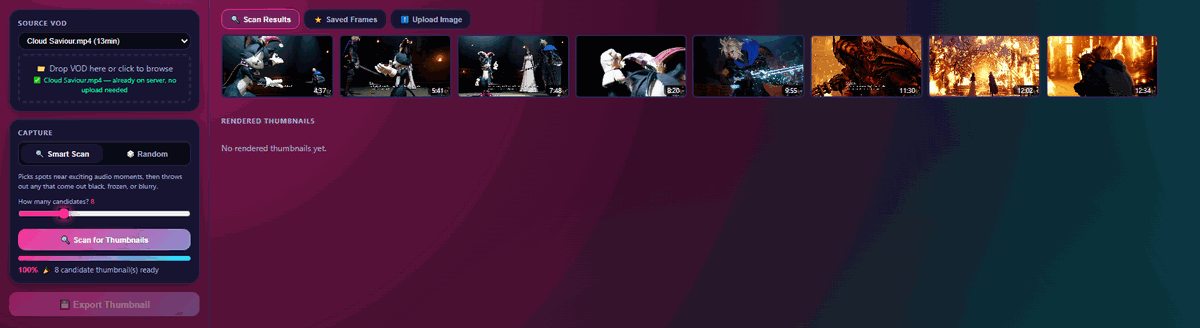
Candidate thumbnails from a Smart Scan.
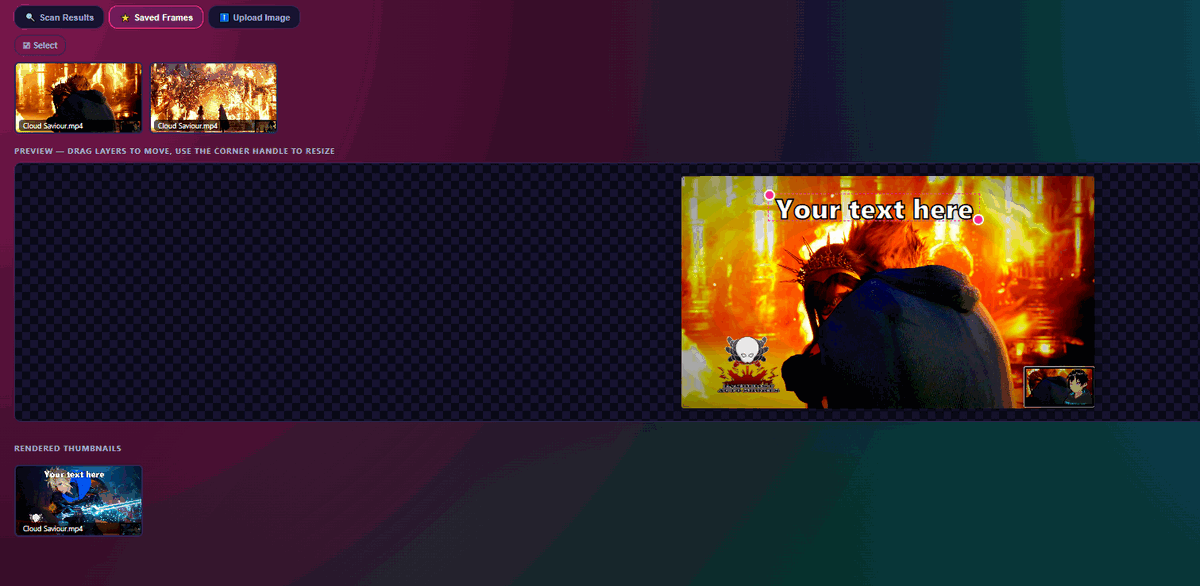
Reusing a starred frame from Saved Frames.
YouTube presets (16:9), Shorts/Vertical presets (9:16), or a fully custom width × height.
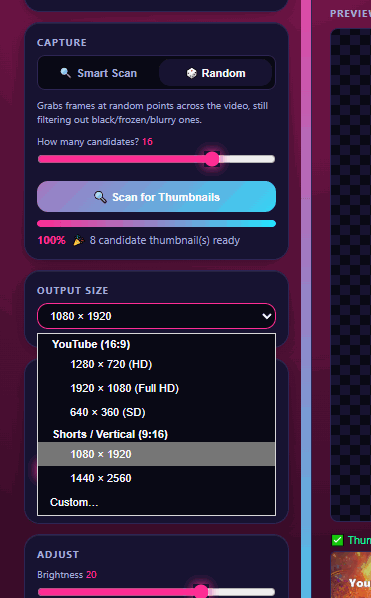
The full list of output size presets.
Zoom 100–300% and drag to reposition. Brightness, Contrast, Gamma, Saturation, Vignette and Warmth sliders, plus a Flip horizontal checkbox. What you see in the editor is exactly what gets exported.
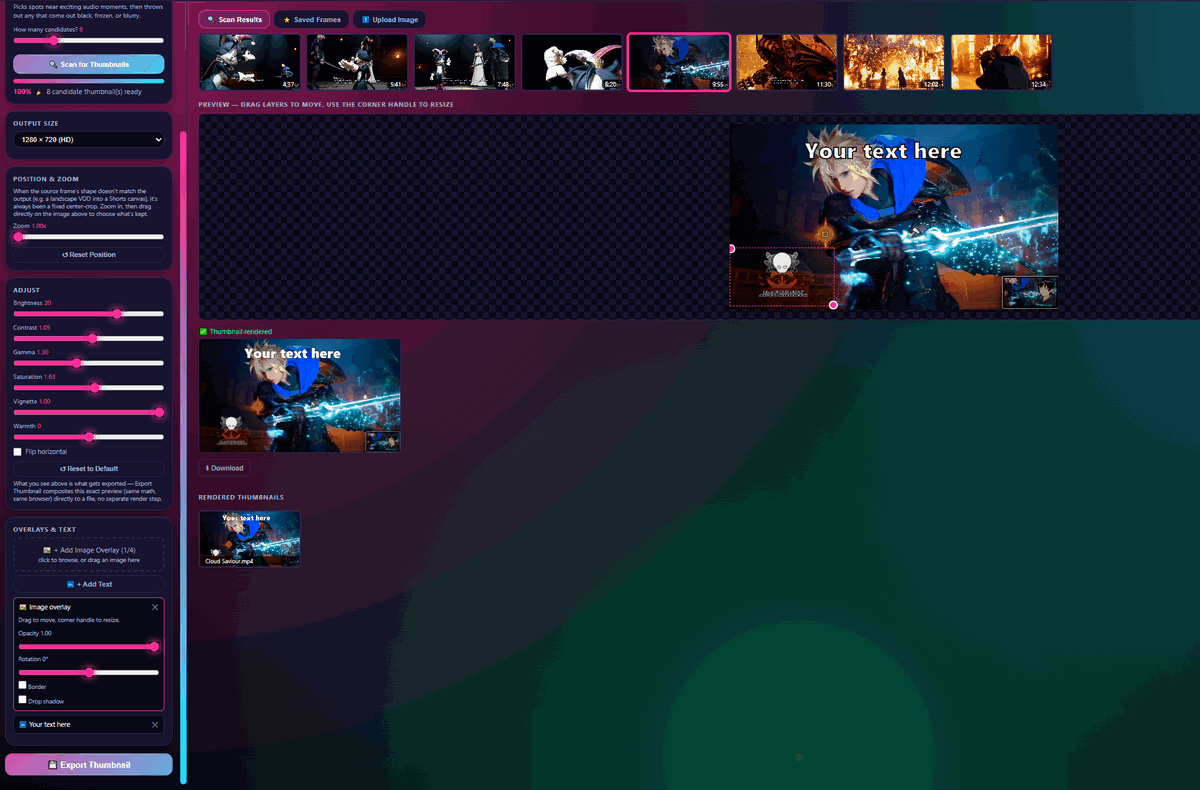
The full editor — Position & Zoom, Adjust, and Overlays together.
Add up to 4 PNG overlays (drag/drop or browse), each with Opacity, Rotation, Border, and Drop shadow controls, plus any number of text layers with their own Color, Stroke, Background box, and Font controls.
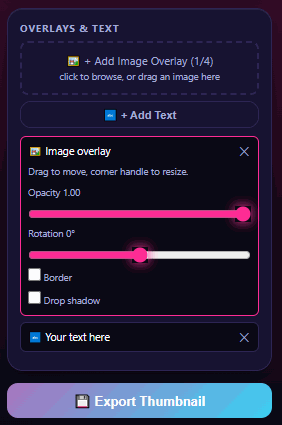
An image overlay's controls.
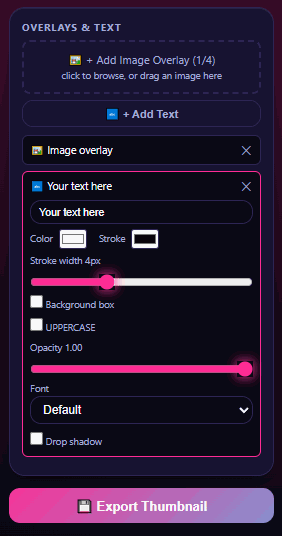
A text layer's controls.
Click 💾 Export Thumbnail when you're happy with it. Finished thumbnails collect in the Rendered Thumbnails gallery.
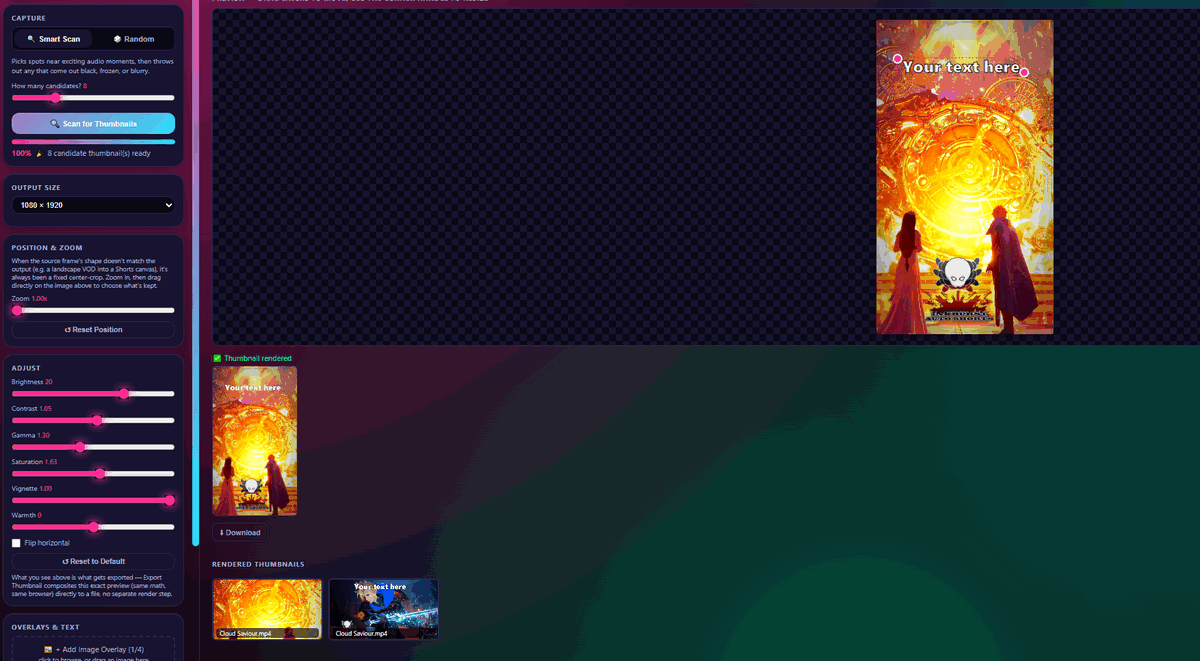
A 9:16 thumbnail, with renders collecting in the gallery below.
AI shows up in two places once you're on the top tier — metadata for Publishing, and layout suggestions for Thumbnail Creator. Neither one touches your clip or your render until you review it.
Open Publish on any clip, then use the Tell the AI about this clip box to give it context — a line like "this is the boss fight at the end" or "keep it low-key, not hype" — before hitting ✨ Generate with AI. It fills in the Title, Description, and Tags fields for you, which you can still edit by hand before you hit Publish.
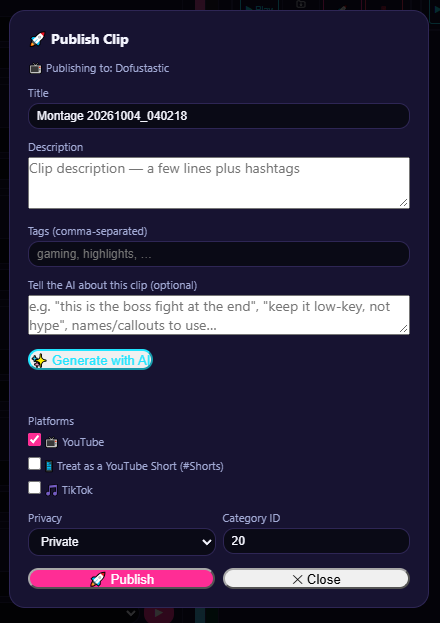
The Publish Clip modal — Tell the AI about this clip, then Generate with AI fills Title/Description/Tags.
On the Overlays & Text step, the AI Suggestions panel looks at the frame you've picked and proposes overlay text and color settings to match it. Add a line in Tell the AI about this image — e.g. "this is the final boss kill, want it hype" — and hit ✨ Generate with AI. Nothing is applied to the export until you review the suggestion and hit Export yourself.
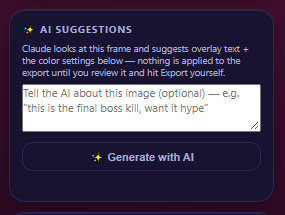
AI Suggestions — proposes overlay text and color settings from the frame; you review before exporting.
Upload a logo once and it's baked into every new Shorts, Highlights, Montage, Stitch, and Landscape (Highlight Reel/Intro + Outro) render automatically — re-rendering an older clip reapplies it too. Swap the file any time to change it everywhere at once.
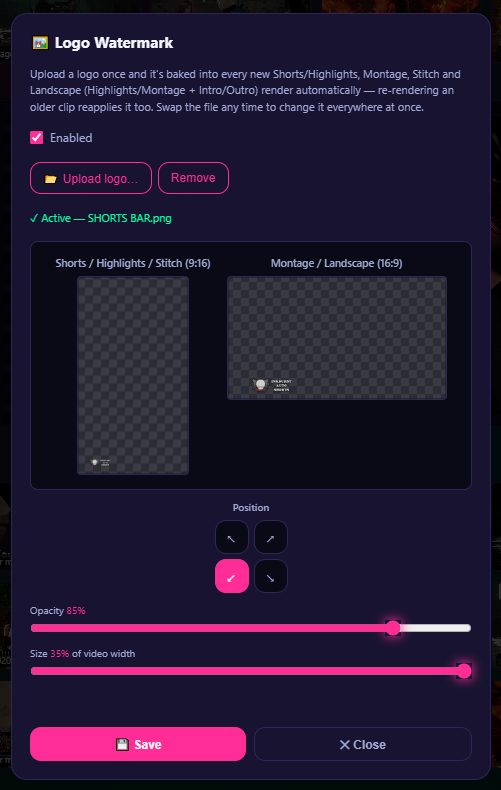
The Logo Watermark panel, with separate 9:16 and 16:9 previews.
Click Save to apply it everywhere, or Close to discard changes.
Open via the ⚙ Settings button in the header.
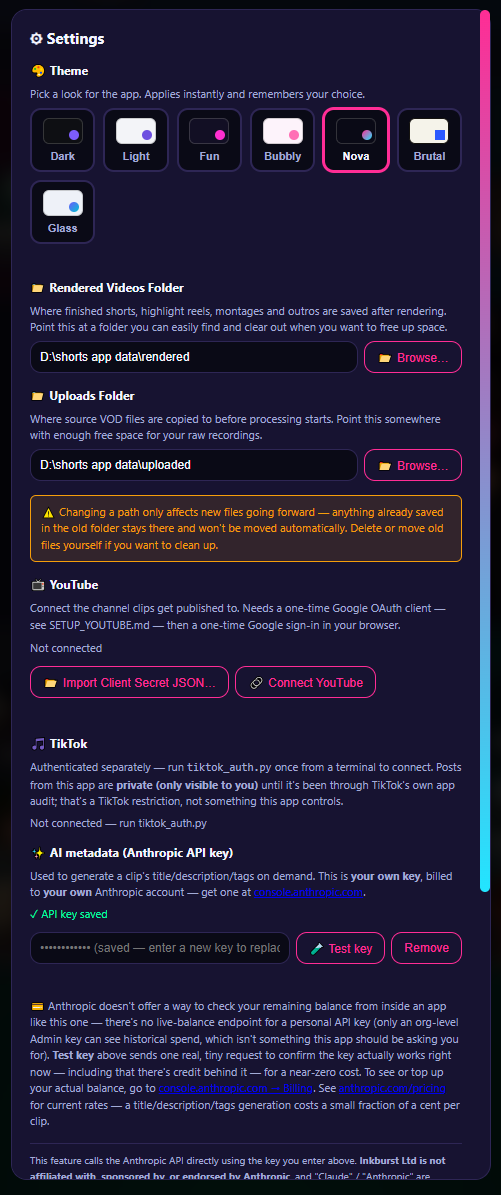
The Settings panel.
Seven complete visual restyles — Dark, Light, Fun, Bubbly, Nova (the default), Brutal, Glass. Click a swatch to apply it instantly; your choice is remembered.
Where finished shorts, highlight reels, montages, and outros are saved after rendering. Point this at a folder you can easily find and clear out when you want to free up space.
Where source VOD files are copied before processing starts. Point this somewhere with enough free space for your raw recordings.
Connect the channel clips get published to. Needs a one-time Google OAuth client (see Connecting YouTube above) — then a one-time Google sign-in in your browser. Use Import Client Secret JSON to pick your credential file, then Connect YouTube to sign in.
Authenticated separately — run tiktok_auth.py once from a terminal to connect. Posts from this app are private (only visible to you) until it's been through TikTok's own app audit — that's a TikTok restriction, not something InkBurst controls.
Used to generate a clip's title, description, and tags on demand. This is your own key, billed to your own Anthropic account — get one at console.anthropic.com. Paste it in and hit Test key to confirm it works right now, then it's saved for every AI Tag Gen call from then on.
This feature calls the Anthropic API directly using the key you enter above. InkBurst Ltd is not affiliated with, sponsored by, or endorsed by Anthropic; "Claude" and "Anthropic" are trademarks of their respective owner.
Click Save to apply your changes, or Cancel to discard them.
If something still doesn't make sense, message on Patreon with: which tab you were on, what you clicked, and the exact text of any error message or log line.
Stuck on something the docs above don't cover? Message through Patreon — pledges get priority replies.
Already a patron? Message through Patreon directly — it's tied to your pledge, so I can see your tier right away.
Message on Patreon